When the event is created, the admins are able to create a challenge for team collaboration.
To create a challenge, open your event on the “Challenge” tab and click on the “Add challenge” button

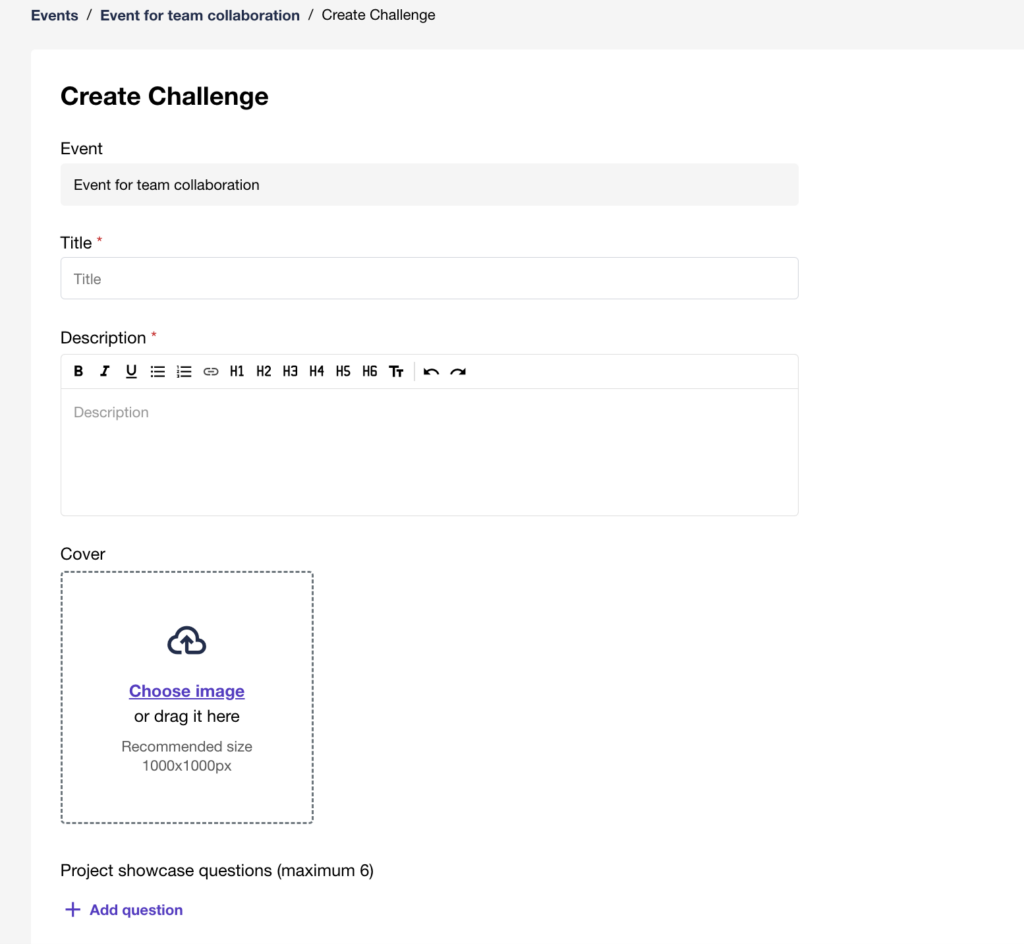
Fill in the title and description in the fields for your new challenge. Set the cover image if you want to use it in your challenge.
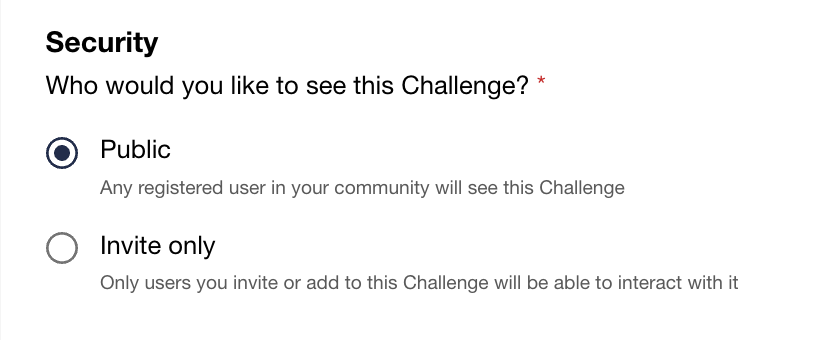
Choose required Security setting for your challenge:
- Public – make it visible for all users
- Invite only – only invited users will be able to view the challenge
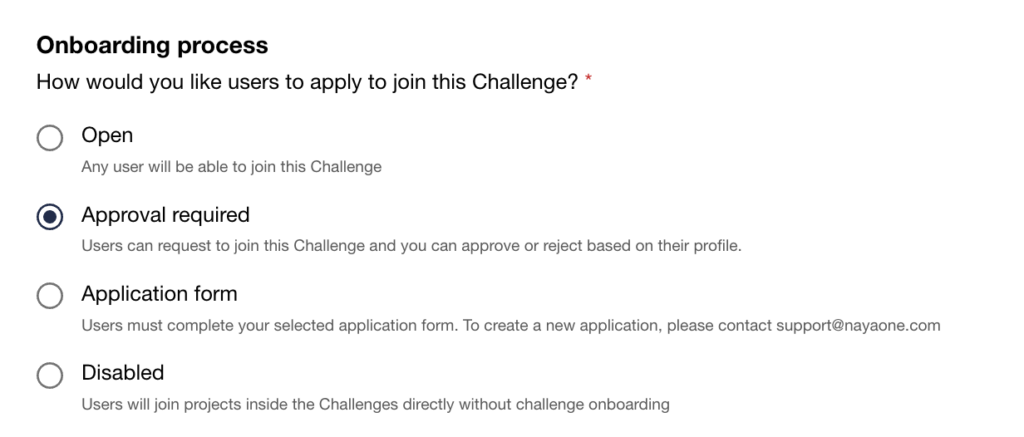
Choose the onboarding type for users. Depending on the settings, the following options will be available for users’ onboarding:
- Open – any user can join the challenge
- Approval required – the user can apply, and the admin will decide to approve them or reject from accessing to the project
- Application form – you can set up the application form with questions. To apply, the user must complete the application form. After that, the admin will decide to approve them or reject from accessing to the project
- Disabled – the onboarding is opene,d and the user can simply join without applying
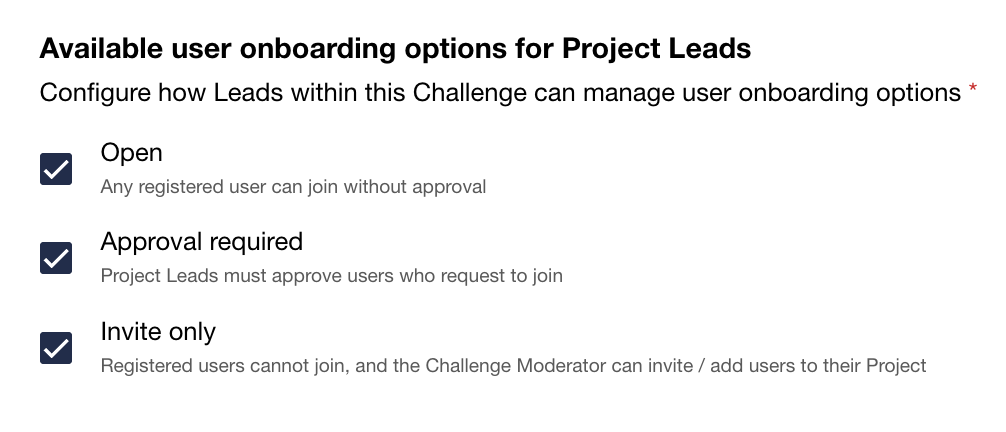
Choose the user onboarding type for Project Leads. Depending on the settings, the following options will be available for users onboarding that is managed by Project Leads:
- Open – Any registered user can join without approval
- Approval required – The Project Leads must approve the applied users
- Invite only – the users can join the Project only via invitation
After all required settings are chosen, click on the “Create Challenge” button to make your challenge live.