How to set up Cloud Sandpit Budget Limits and Notifications
Users now have the capability to set budget limits on their Cloud Sandpits from the Sandpit Creation form during project creation and management. This document will provide the necessary steps to set up budget limits on your cloud sandpit.
Prerequisites #
- User is either
- In the process of proposing/creating a new project and has initiated the Sandpit creation form
- Has an existing project and is in the process of setting up a new Sandpit
- User is already at step 2 of the Sandpit creation process
Setting up Cloud Sandpit Budgets #
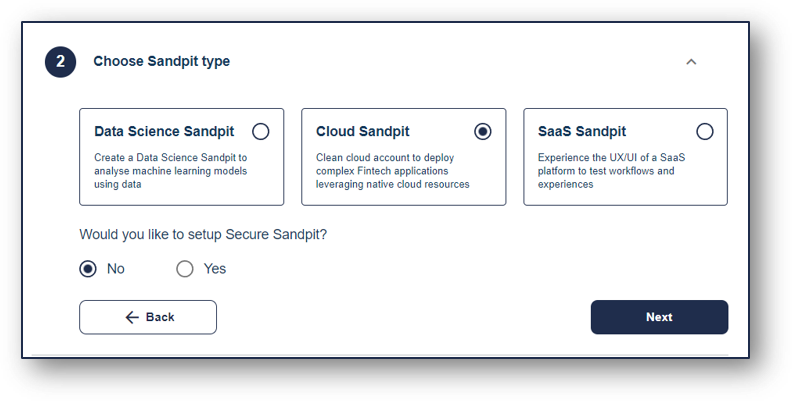
1. Select Cloud Sandpit on Step 2 to enable budget management features
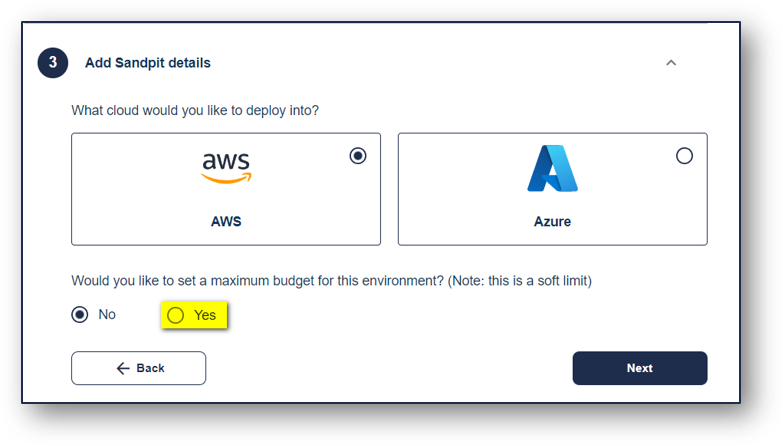
2. Select Yes on the following question. Note that the Cloud Budget limit feature is currently limited to AWS sandpits for now.
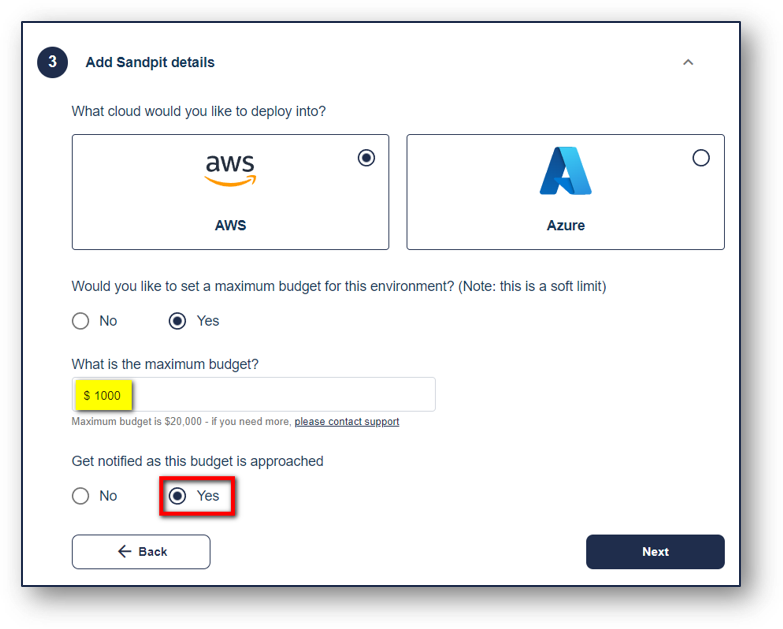
3. Input the budget that you would like to allocate for the sandpit being created, Then toggle the Yes option here to enable notifications for this cloud sandpit
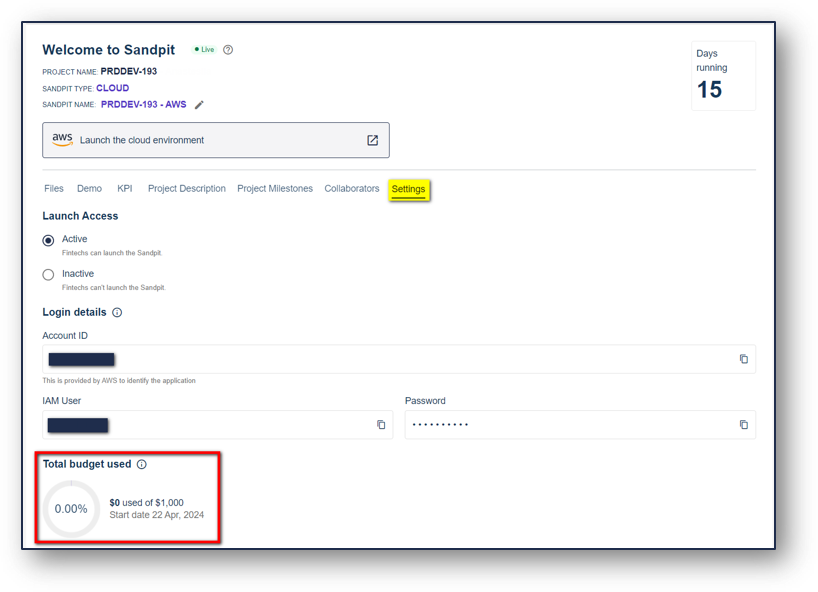
4. View your sandpit’s parameters by navigating to the Settings tab, Review your budget utilization against cloud usage on the budget widget
Verifying your budget set up #
1. Click the Launch the cloud environment button to access the associated AWS console
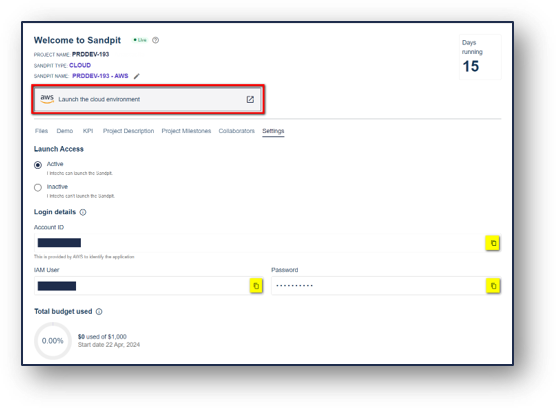
2. Use the login credentials provided on the login details section to sign into AWS

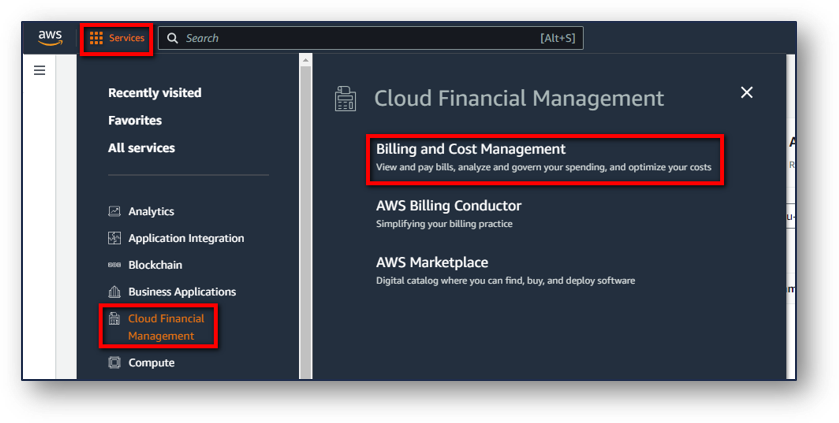
3. Navigate to the Billing and Cost Management module using the following path: Services > Cloud Financial Management > Billing and Cost Management
4. Click on Budgets in the navigation menu to view your budget details
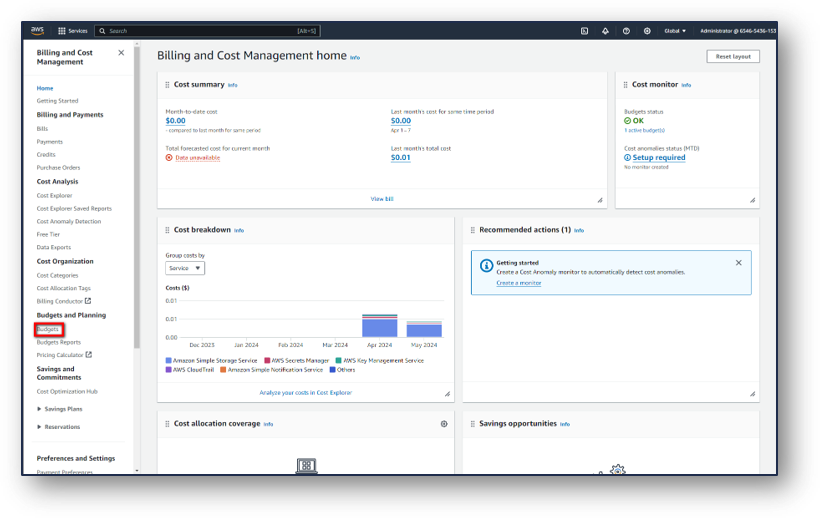
5. Verify that the budget created by the system matches your budget limit, Click on the budget name to view more details

Validating and updating your notification set up #
1. Click on the View all alerts button to access your notification set up
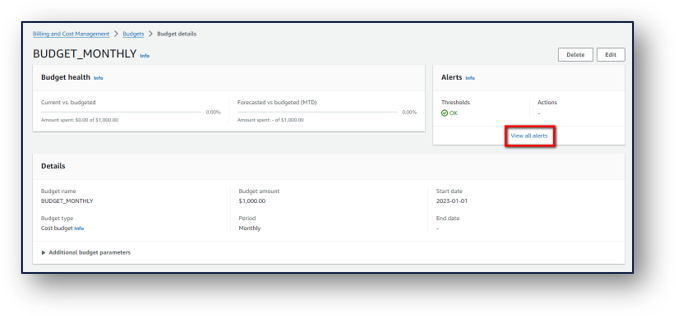
2. Click on the Edit alerts button to make changes to your notification set up
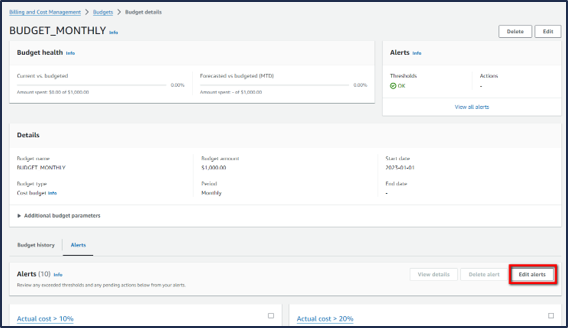
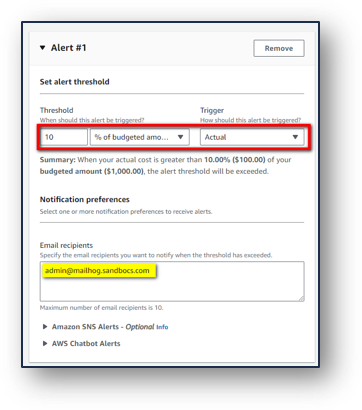
3. Edit your threshold amounts and email recipients for each alert
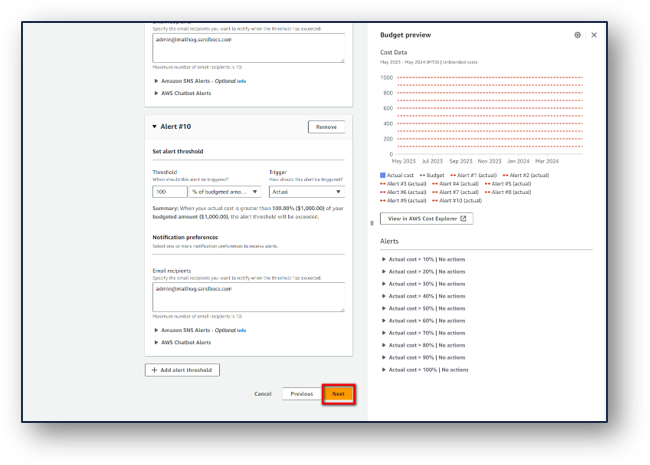
4. Click on Next until the Review page once you have applied all your changes
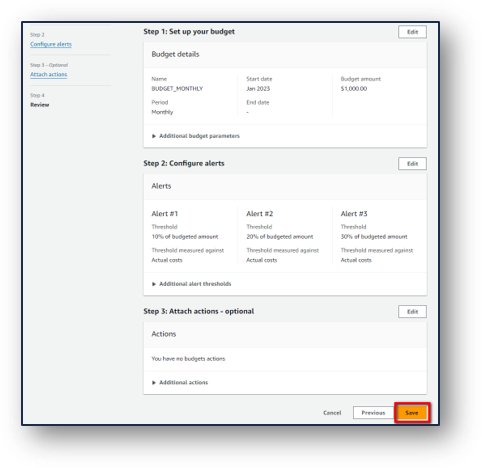
5. Click on the Save button on the Review page to apply your changes
6. Wait for the toaster message validating that your changes have been applied


